Sunday, March 20, 2011

My Nemesis

Do you ever have a project that just kicks your butt every direction you turn? 

I have lovingly referred to this cabinet as the "Project from H E (double) L!!! ;)

I think it is the first furniture piece I have ever taken on.  But after seeing all the wonderful redo's in blogland, I decided I had to do it too!  You know how that goes. LOL

So it started with this $15 Craigslist find...LAST SUMMER!

Yes....I have been slowly redoing this cabinet for well over SIX MONTHS!!!  Maybe nine?

Now you know why I call it my nemesis!

Here she is before:


AWFUL!

It used to be an old bathroom cabinet.  It would have hung the other direction....like this:


Is it weird that turning the picture upside down like that makes me nauseous? LOL

Anywho....it had a crackle finish.  I 'think' some type of oil based paint.  And had painting on the back.

It was B.A.D.

The inside was covered with old contact paper.


And let me tell you....that stuff was STUCK!

So, as a furniture novice...first I removed the contact paper.  Which turned out to be a nightmare!  It was down so hard, I couldn't just pull it off.  I had to use wallpaper remover and a scraper!

I was frustrated before really even starting. 

So I let it sit awhile before coming back to it.

When I finally got up the nerve to revisit this project, I tried sanding it.

But I decided pretty quickly that I was going to need to strip it!  UGH! 

I wasn't sure what kind of effect that crackle and oil (I think) paint would have on my finished product and I sure didn't want to do all that work to paint it and have it messed up.  And sanding wasn't getting me anywhere fast.

So, I bought furniture stripper and went to town. 

Furniture stripper was actually pretty easy to use...but it took me several coats to get it acceptable.

So....I got frustrated....and it sat....again. LOL

Next, I decided spray paint was the way to go. 

Doodle's room needed more of the grayish blue color spread around, so I figured the cabinet would be a great way to do that.

Unfortunately, the color I 'thought' would work, turned out looking like 1985, let's add some ducks wallpaper!!!

Thoroughly FRUSTRATED.....yep......it sat for MONTHS!!!!

Then finally, as Doodle's room was coming together, I knew she was going to need that cabinet for storage.  So, I repainted it.  This time with a quart of paint I got at Lowe's, a close match to her throw pillow.

YES!!! 

Finally!!!

Something I was pleased with.


BUT.....I did NOT want to tackle stripping the doors!!!

So, it went in her room, without doors, for MONTHS. LOL


But, FINALLY, with my new found freedom, I got the gumption to finish the whole stinkin' thing!!  It moved to the top of my list very quickly. :)

And last week, with a huge sigh of relief (and possibly some dancing and whooping), I finished the cabinet that was once my nemesis!!!

And I am in LOVE!! :)


I added feet I got at Lowe's to the bottom of the cabinet to make it look more like it was meant to be standing on the floor and not hanging on a wall.


Of course I distressed it.


I was a bit overwhelmed when picking out the knobs.  So many things would have looked great on this cabinet.  But eventually I decided I wanted a somewhat vintage, but understated look for the cabinet.

I got the adorable knobs at Hobby Lobby for $2.99 (I think, they may have been $3.99 each).


And now Doodle has a ton of hidden storage for her books, movies and bead supplies!!


And most important of all.....I can finally mark this project off my list!!!  LOL

Staged, before I had to add all her tween girl stuff: ;)


And here with the stereo, her beloved shells, and collectible she loves. :)

I got the little lamp at the Christmas Tree Shoppe for $10.  That place is so awesome.


I have a few more things to finish up in her room, but it is almost complete!!!

And I have some other functional ideas I used in her tiny 9x9 bedroom to show you soon! :)

(Check out the tab at the top of the page for the parties I attend and will be linking this project to.) :)


Tuesday, March 15, 2011

Spring Fling

Yes, I had a little rendezvous with spring today!!

I went to the Indianapolis Flower and Patio Show! :)

It was absolutely wonderful!  All kinds of mock gardens and landscapes set up for inspiration.


And....flowers, flowers, and more flowers!


I took a gazillion pictures so I could share some of the SPRING scenes with you...because if you are like me, you are counting down the days to get out into the yard and get your hands dirty again!!!!! :)


I'm a novice gardener....but I love it all the same.


If you are a city dweller, they had some really great ideas for rooftop patios!


And check out this wall behind the outdoor sectional...those are plants planted into small holes in a wall!!


And can imagine having this in your backyard?!?!  It would be like being on vacation at your own home!


I was completely and utterly, head over heals in LOVE with this door!!!


And the succulent wreath ON the door!!


Although excuse my shadow...I'm not really BALD...even though I look it there. LOL

This tree had my name all over it!  50% everything at the show (for this vendor - when the show is over).  But, NOOOOO, someone else had already bought this little darling before me. :(


And just a couple more shots of spring goodness! :)


And you know what else I learned today....................I CAN take flashless pictures!!!  Because all these pictures were taken by ME, NO flash, with Doodle's little $100 point and shoot! 

I just, apparently, need a GAZILLION lights overhead. LOL


Thursday, March 10, 2011

Laundry/Craft Rooms

Do you have a headache yet?

Sadly, I post in current time....so while I'm posting about half of Doodle's Room Reveal, Kitchen Decor Inspiration, and Redoing my Living Room....yep, that is exactly the order those are going in here at my house too...not just on my blog!

I AM all over the place like that. LOL

And NO...I haven't finished any of those projects yet. :)

I confess that I have "Project ADD"!  LOL

This week my office/craft room finally drove me over the edge!!  I couldn't stand to look at it one more minute!

Here is what it looked like:

 (Sorry, for the REALLY bad pictures!  It has been cloudy and gross here for days!)

It's looked like that for MONTHS!!!  I just could not take it another day!

I'm turning this room back into a bedroom. 

I do not use that room!  I usually surf the web on my little Acer Netbook in bed or on the couch, so the desktop, while staying, does not need it's own room.  And I do NOT do crafts in here.  I almost always use the coffee table to work on crafts.  So, really I just need good storage, not a whole room, dedicated to my craft supplies! 

So, the crap stuff needs to find a new home!

Enter my laundry room!  Which was turning into another dumping spot.


Somehow I had to combine these two spaces into ONE!! 

Don't laugh!!  It is possible....I hope. ;)

I took every. single. solitary. shelf. in my entire house at some point and put it in that laundry room to try out!  I can't afford some elaborate system...so I have to use what I have.

I wish I had taken pictures of all my trial and errors...but of course I became so fixated I forgot. LOL

Anywho...here is what I ended up with.  I am VERY pleased!!


It's not as claustrophobic as the big black shelves from the office felt.


What's behind the curtain you ask?

My laundry supplies (and my utility closet...which is why everything has to be removable as well)!


I'm not done. 

I have to find one more basket (did you notice that one was missing?  ARGH! They were sold out of that size when I checked. Those are from K-Mart by the way.  I bought them ages ago, but they still carry them for $9.99).

I need to label the baskets for easier use. 

Plus, I have a ton of projects still in the office that need to be finished or donated or something!

I am SOOOO thankful I bought a stackable washer/dryer years ago!  I don't know what I would have done when I bought this house without them.  They fit perfectly into my little laundry "nook".

That door to the right is my back door, it leads to the backyard. 

Can you believe I got that much storage into that teeny tiny space?!?! 


I will post more in the upcoming days about the additional changes I've made to this area!  I have some plans. ;)


UPDATE:  This project was featured at Delightful Order!


Sunday, March 06, 2011

Upcycled Burlap Tissue Cover

Helloooo Ladies! :)

I am SO sorry I've been somewhat MIA the last week or so.  Losing my job, as strange as this sounds, was exhausting!!

I've had no gumption what-so-ever to edit pictures, type up posts or even be on the computer.  

But thank goodness I have been working on some projects. 

And I did complete a project last week that I was so excited to blog about that it sparked my mojo into gear! 

Here is the project that has me all giddy!! :)

I bought this little lovely months ago at one of my favorite thrift stores for $0.95.


I'm on a kick right now trying to get through projects I've had just sitting around and using what I have on hand. 

I'm planning a garage overhaul as soon as spring hits, so I figured I'd make it easier by actually finishing some projects that are just sitting and taking up space.  :)

So, with that in mind, I took my lovely circa 1988 tissue holder and spray painted it brown.


I planned to cover it in burlap, but you can somewhat see through burlap, so the paint just made for a neutral backdrop for the burlap.

Next I Modge Podged my burlap around the tissue holder, and a separate piece for the top.


I'm usually pretty impatient, but this time I actually had to wait for it to dry completely in order to clean up the edges with scissors.

Next, I hot glued a ruffled edge I purchased at JoAnn's Fabric (since I don't sew...I am SO thankful things like this can be bought pre-made!).


Too unfinished...so I also hot glued on some AWESOME trim I bought at JoAnn's awhile back.  This was around $2 a yard, but you can usually find it on sale or they run coupons weekly in the newspaper...which is the only time I buy this kind of stuff.


I had rough, unfinished edges from where I cut the top separate from the sides.  So, I also used the trim around the upper edge.

I just used a pair of small scissors and cut around the edge of the opening to create a clean look.  Since the Modge Podge makes the burlap super stiff, this was easy.


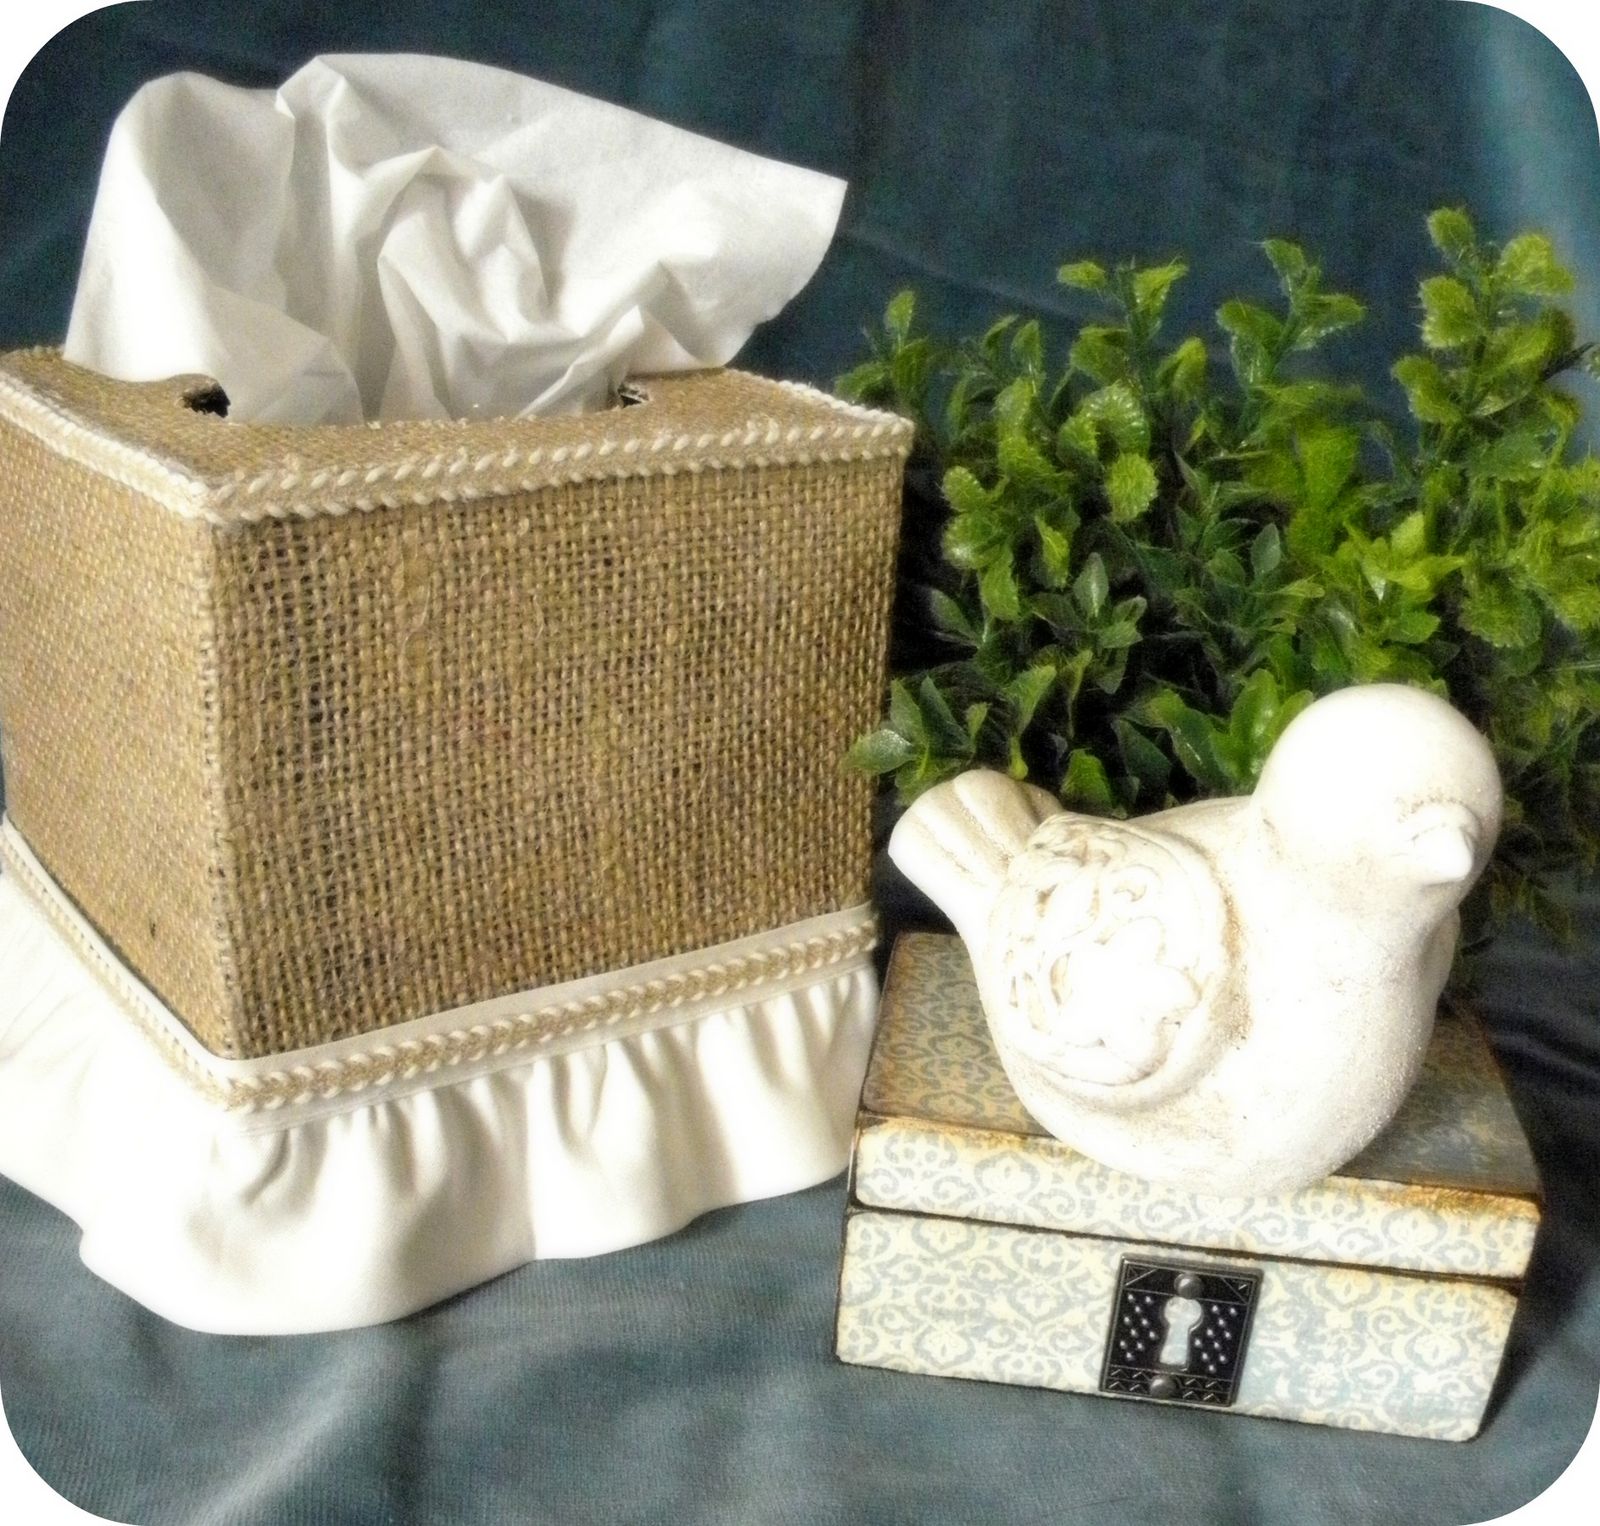
And here you have my finished...very cottage looking...tissue box cover!!!


And since I have a bit more time on my hands, I'm playing with my photography!  So, here's a few more fun shots.


And here is where my new tissue holder sits...


Isn't  it adorable?!?!?  I'm totally in love!! 

And just because...here's one more looksy! :)


Since I did not use anywhere near a yard of the trim pieces, and I had the burlap on hand, I estimated this whole thing cost me around $3. 


Update:  This project was featured at House of Grace


HOG