Do you ever have a project that just kicks your butt every direction you turn?
I have lovingly referred to this cabinet as the "Project from H E (double) L!!! ;)
I think it is the first furniture piece I have ever taken on. But after seeing all the wonderful redo's in blogland, I decided I had to do it too! You know how that goes. LOL
So it started with this $15 Craigslist find...LAST SUMMER!
Yes....I have been slowly redoing this cabinet for well over SIX MONTHS!!! Maybe nine?
Now you know why I call it my nemesis!
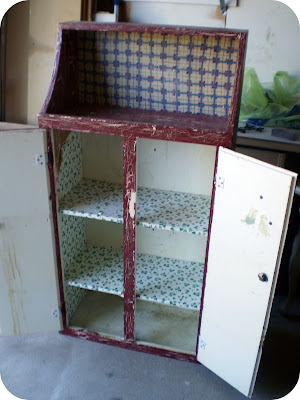
Here she is before:
AWFUL!
It used to be an old bathroom cabinet. It would have hung the other direction....like this:
Is it weird that turning the picture upside down like that makes me nauseous? LOL
Anywho....it had a crackle finish. I 'think' some type of oil based paint. And had painting on the back.
It was B.A.D.
The inside was covered with old contact paper.
And let me tell you....that stuff was STUCK!
So, as a furniture novice...first I removed the contact paper. Which turned out to be a nightmare! It was down so hard, I couldn't just pull it off. I had to use wallpaper remover and a scraper!
I was frustrated before really even starting.
So I let it sit awhile before coming back to it.
When I finally got up the nerve to revisit this project, I tried sanding it.
But I decided pretty quickly that I was going to need to strip it! UGH!
I wasn't sure what kind of effect that crackle and oil (I think) paint would have on my finished product and I sure didn't want to do all that work to paint it and have it messed up. And sanding wasn't getting me anywhere fast.
So, I bought furniture stripper and went to town.
Furniture stripper was actually pretty easy to use...but it took me several coats to get it acceptable.
So....I got frustrated....and it sat....again. LOL
Next, I decided spray paint was the way to go.
Doodle's room needed more of the grayish blue color spread around, so I figured the cabinet would be a great way to do that.
Unfortunately, the color I 'thought' would work, turned out looking like 1985, let's add some ducks wallpaper!!!
Thoroughly FRUSTRATED.....yep......it sat for MONTHS!!!!
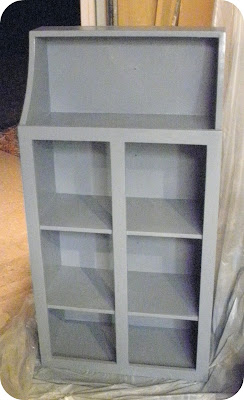
Then finally, as Doodle's room was coming together, I knew she was going to need that cabinet for storage. So, I repainted it. This time with a quart of paint I got at Lowe's, a close match to her throw pillow.
YES!!!
Finally!!!
Something I was pleased with.
BUT.....I did NOT want to tackle stripping the doors!!!
So, it went in her room, without doors, for MONTHS. LOL
But, FINALLY, with my new found freedom, I got the gumption to finish the whole stinkin' thing!! It moved to the top of my list very quickly. :)
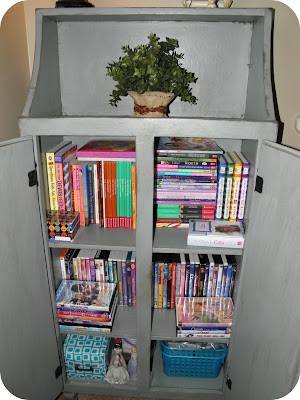
And last week, with a huge sigh of relief (and possibly some dancing and whooping), I finished the cabinet that was once my nemesis!!!
And I am in LOVE!! :)
I added feet I got at Lowe's to the bottom of the cabinet to make it look more like it was meant to be standing on the floor and not hanging on a wall.
Of course I distressed it.
I was a bit overwhelmed when picking out the knobs. So many things would have looked great on this cabinet. But eventually I decided I wanted a somewhat vintage, but understated look for the cabinet.
I got the adorable knobs at Hobby Lobby for $2.99 (I think, they may have been $3.99 each).
And now Doodle has a ton of hidden storage for her books, movies and bead supplies!!
And most important of all.....I can finally mark this project off my list!!! LOL
Staged, before I had to add all her tween girl stuff: ;)
And here with the stereo, her beloved shells, and collectible she loves. :)
I got the little lamp at the Christmas Tree Shoppe for $10. That place is so awesome.
I have a few more things to finish up in her room, but it is almost complete!!!
And I have some other functional ideas I used in her tiny 9x9 bedroom to show you soon! :)
(Check out the tab at the top of the page for the parties I attend and will be linking this project to.) :)


